66-67 Dodge Charger Source Guide


Parts Diagram - Rear Seats
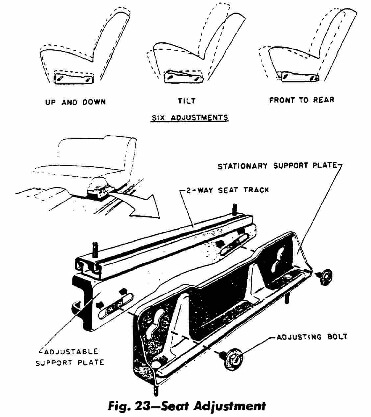
Seats - Adjustment

Posted by Ken scobel on 04/02/06

Seats - Upholstery

Seat Foam

Posted by: David Lind on 09/23/05

Legendary Interiors (John Paseman - US CarTools ). They are extremely helpful and knowledgeable. I just bought a replacement set for my car for $170 plus shipping. However, there are no specific replacement "buns" for the back seats. The interior shop simply uses bulk foam to make the back cushions. (David Lind)

Posted by: Topher on 02/18/06

Don't count out your local uhpolsterer.  I had my seats done at a local shop and the guy did an excellent job.   I also have a buddy that has his own business and all he does(if it's salvageable) is put sheet foam over the existing bun of the seat.   Now if he has to build an entire seat he'll use a big block of foam and carve out what he needs.  It's fun to watch these guys work cause they'll add a lil foam, and sit in the seat, if it's not good enough they'll add more till it feels good.  There's also different grades of foam, the density, elasticity is different.  You could have a chunk 3 foot thick and think man that's hard, jump on it and sink to the ground, so you have to keep that in mind also. I will say that for the cost of the skins from YO, I had all 4 seats done by this guy, and I didn't have to do a thing but unbolt the seats and carry them over there.

Posted by Daniel Daigneault on 09/23/05

Year One catalog 2004 page 22, # 2FC66202U. The 3 digit number being the color.  It is for a 1966 Coronet.  My 66 Charger seats are exactly like the picture.  Nothing is available for the back seats though.  The same catalog page 14 on the right upper corner tells you about the foam.
Or try www.yearone.com

Posted by Greg Rose on 09/29/03

If you've never done seats before, I'd find somebody who has and help them (learn with them). If this is a "one time" event - pay a pro. It's not hard, but tricky and experience is almost a must. I did my seats last winter with a friend from work who used to work at a custom upholstery shop. Not sure I could have done as nice a job by myself - actually I'm sure I couldn't.

1. Use 3M Super Vinyl Adhesive - the foam will tear before it lets loose

2. Use burlap and reinforce it with the wire stays from the old burlap. Take the time to weave it in. It will save the foam from the springs.
3. Think about swapping the passenger & drivers seat bottoms - chances are the springs on the pass. side will not be as "tired".

4. There are wire stays in the contour lines of the seat covers that must be re-used. They are ringed to the seat frame through the foams - they are a bugger!! If you lose them, cutting a wire hanger may work.
5. A little plastic from a garbage bag, etc. can be your best tool to stretch the covers as they will tend to "stick" to the foam and not slide where you want them.
6. A hair dryer is a good friend to get the covers to lay smoothly - nice warm sun works if you're that lucky.
7. While you have the frames bare - wire brush and paint them. Repair any broken springs.
8. That 3M adhesive helps get the carpet inserts on the back to lay nicely; 9. As mentioned earlier, double the covers where you ring them. Use plenty (of rings) - note the locations on the old covers.
10. Buy a GOOD set of hog ring pliers. You have to "man handle" most of the ring installations and a good heavy-duty set of pliers is invaluable!

Posted by Dorn Laurenson on 09/30/03

I was taught that the reason for the material between the foam and springs is to prevent the springs from cutting in to the foam. Instead of glueing material to the foam (doesn't add any support to the spring rate) or using burlap (doesn't hold up over time as evidenced by what you removed), try installing any muslin, velour, vinyl, or similar material that is strong to the springs directly by hog ringing around the edge or perimeter of the spring base.
Start on one side by placing a couple of hog rings, then spin the seat 180 degrees and pull the material tight and hog ring the other side. Fold the material everywhere you place a hog ring. Do the same for the other two sides and continue to fasten all around the perimeter pulling it tight and attaching with hog rings every inch or so. This, in essence, not only prevents the springs from cutting into the foam, but also tightens up the spring base and spreads the load accross all of the springs. You'll find it to be firmer, yet still comfortable to sit on with the foam installed.
Another trick if you need to stretch the seatcovers, is to put them in the dryer for short periods of time until they are warm to the touch. Definately sneak up on the right temp. You don't want to pull a mass of melted vinyl out.
If the new seat cushions are a little pricey for you, and they are for many of us, you can foam the seats yourself by going to or ordering online from a upholstery supply. If you're interested in learning this stuff, check out the local college to see if they have a program. That's where I learned, and I happened to have Ron Mangus as a teacher. Very well known in the street rod industry. He has a web site where you can purchase a instruction book that he co-wrote called Custom Auto Interiors Highly recommended.

I'd be happy to discuss upholstery with anyone in the group. Email me

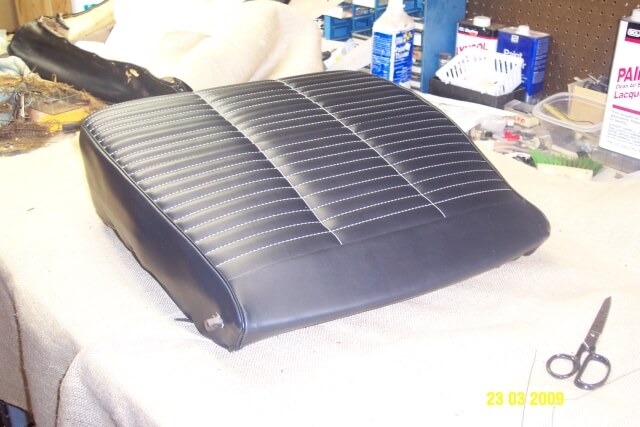
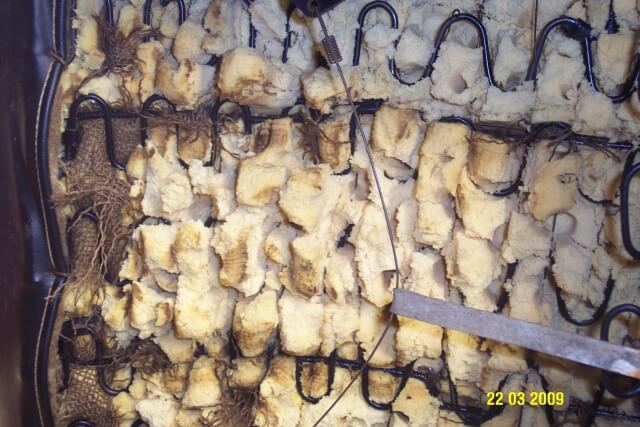
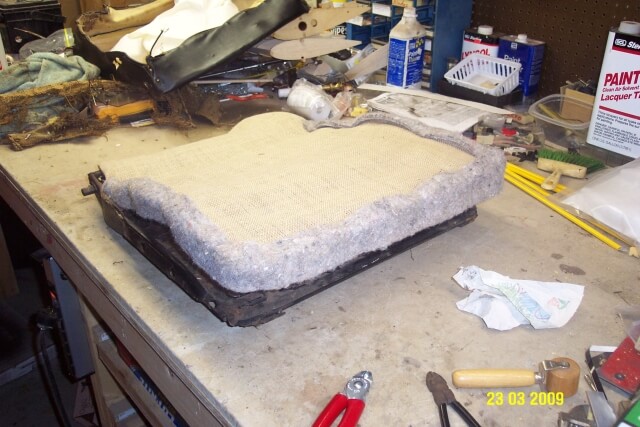
Submitted to Yahoo Group by Mark Hackathorn on 4/2/2009


Here's why I had to redo the seats, not only were they ripped all over on the outside, but the underneath had disintegrated to the point where the springs were pushed into the foam making them very uncomfortable and messy as the foam would flake off making a mess of the new carpet I installed last year...

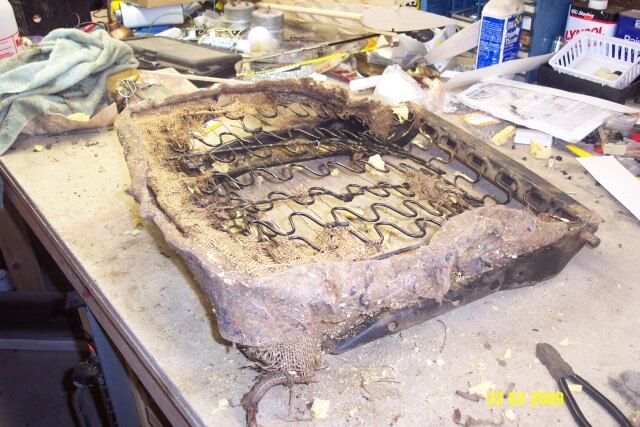
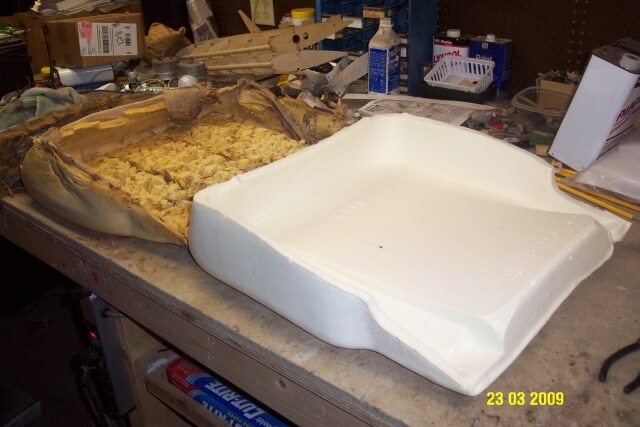
Here's the seat bottom with the  old  cover and foam removed...
 
 
Here is a shot of the new foam...  quite a big difference...
 
Here is the frame newly prepped for the new foam and cover...   I got the burlap from a somewhat local fabric store for $3.80.  I got the thick edge padding from a local carpet store...  turns out he has a mint '64 Malibu SS sitting in the back of his warehouse and gave me the padding for free...
 
There are two pockets under the seat covers that need to have the wires from the old seat installed into the new covers.  You also have to modify the seat foam to accept the pockets with the wires...
 
The pockets are 6" apart...  Here is the foam ready to be cut...
 
So the biggest problem with these seats is...  those wires in the seat cover pockets are supposed to be hog ringed to the seat frame...  but you can't see them because of the burlap in-between the frame and the foam.  If you ignore putting in new burlap, you eliminate this problem...  I wanted the burlap...  Even the factory had problems with this as they only caught one hog ring on one pocket wire...  the other six  attempts were a miss...

I used some thin wire to loop around the pocket wires that were long enough for me to "sew" them through the burlap and catch each side of the frame wire they were supposed to be hog ringed too...  Once everything was together, all I had to do was pull the "sewing" wires tight, which pulled the pocket wire right up to the frame wire...  and hog ring 'em...  I got 8 for 8 with this method.  Once the pocket wires were secure, I used a pair of pliers to pull the "sewing" back wires out...
 
I didn't heat the covers and I didn't think they needed that much force.  I put a towel over the corner of my bench, kinda leaned into the seat to compress the seat springs, folded over the cover and hog  ringed it. 
 
Really, the hardest most frustrating part for me was to remember to reload the Hog pliers with another hog ring...  I can't even guess how many times I got everything just the way I wanted it, and then when I reached for the pliers...  it wasn't loaded!  Then I had to let everything go, reload the pliers and start again...  By the time I got to the seat back I had learned almost enough times and it only happened a few times.
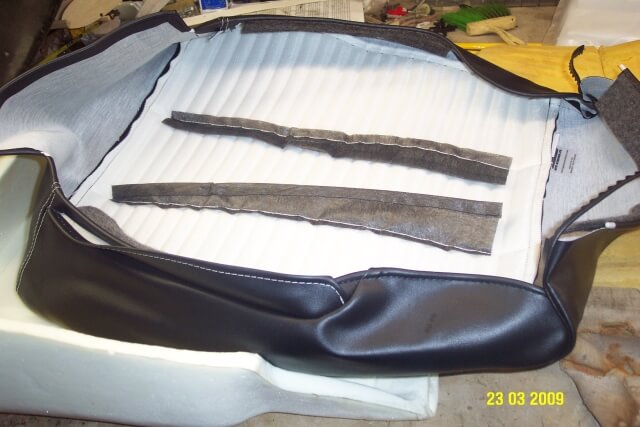
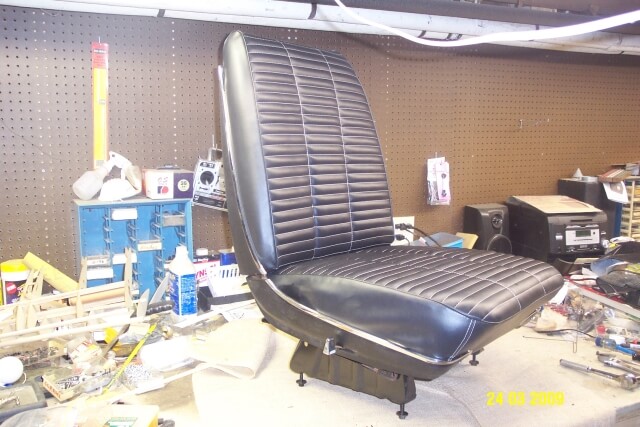
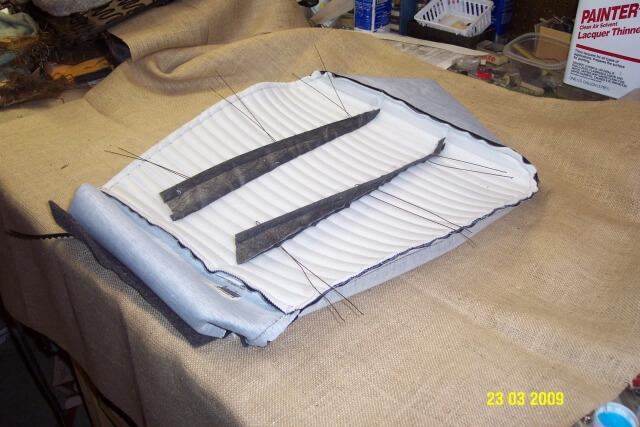
Here is the finished seat bottom...
 
Do the whole thing over again for the seat back...  And the finished product...